
Managing ENS Regions and Notifications
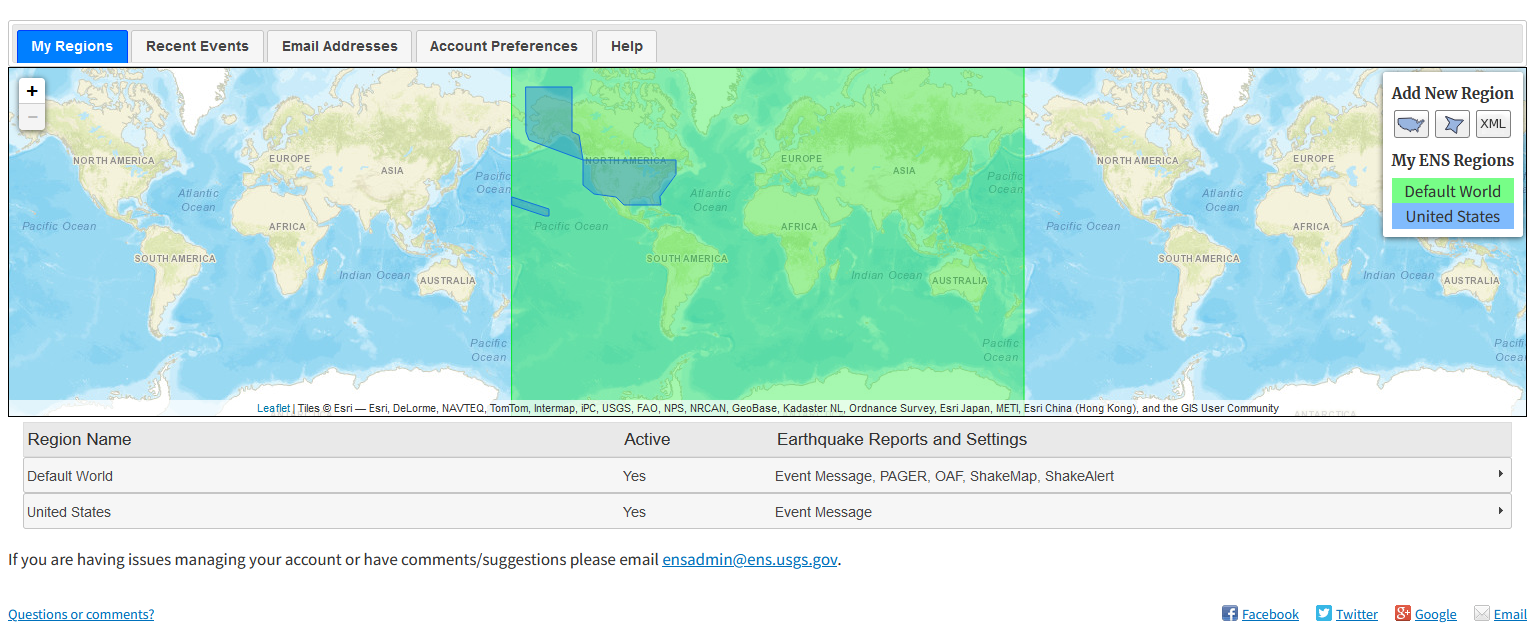
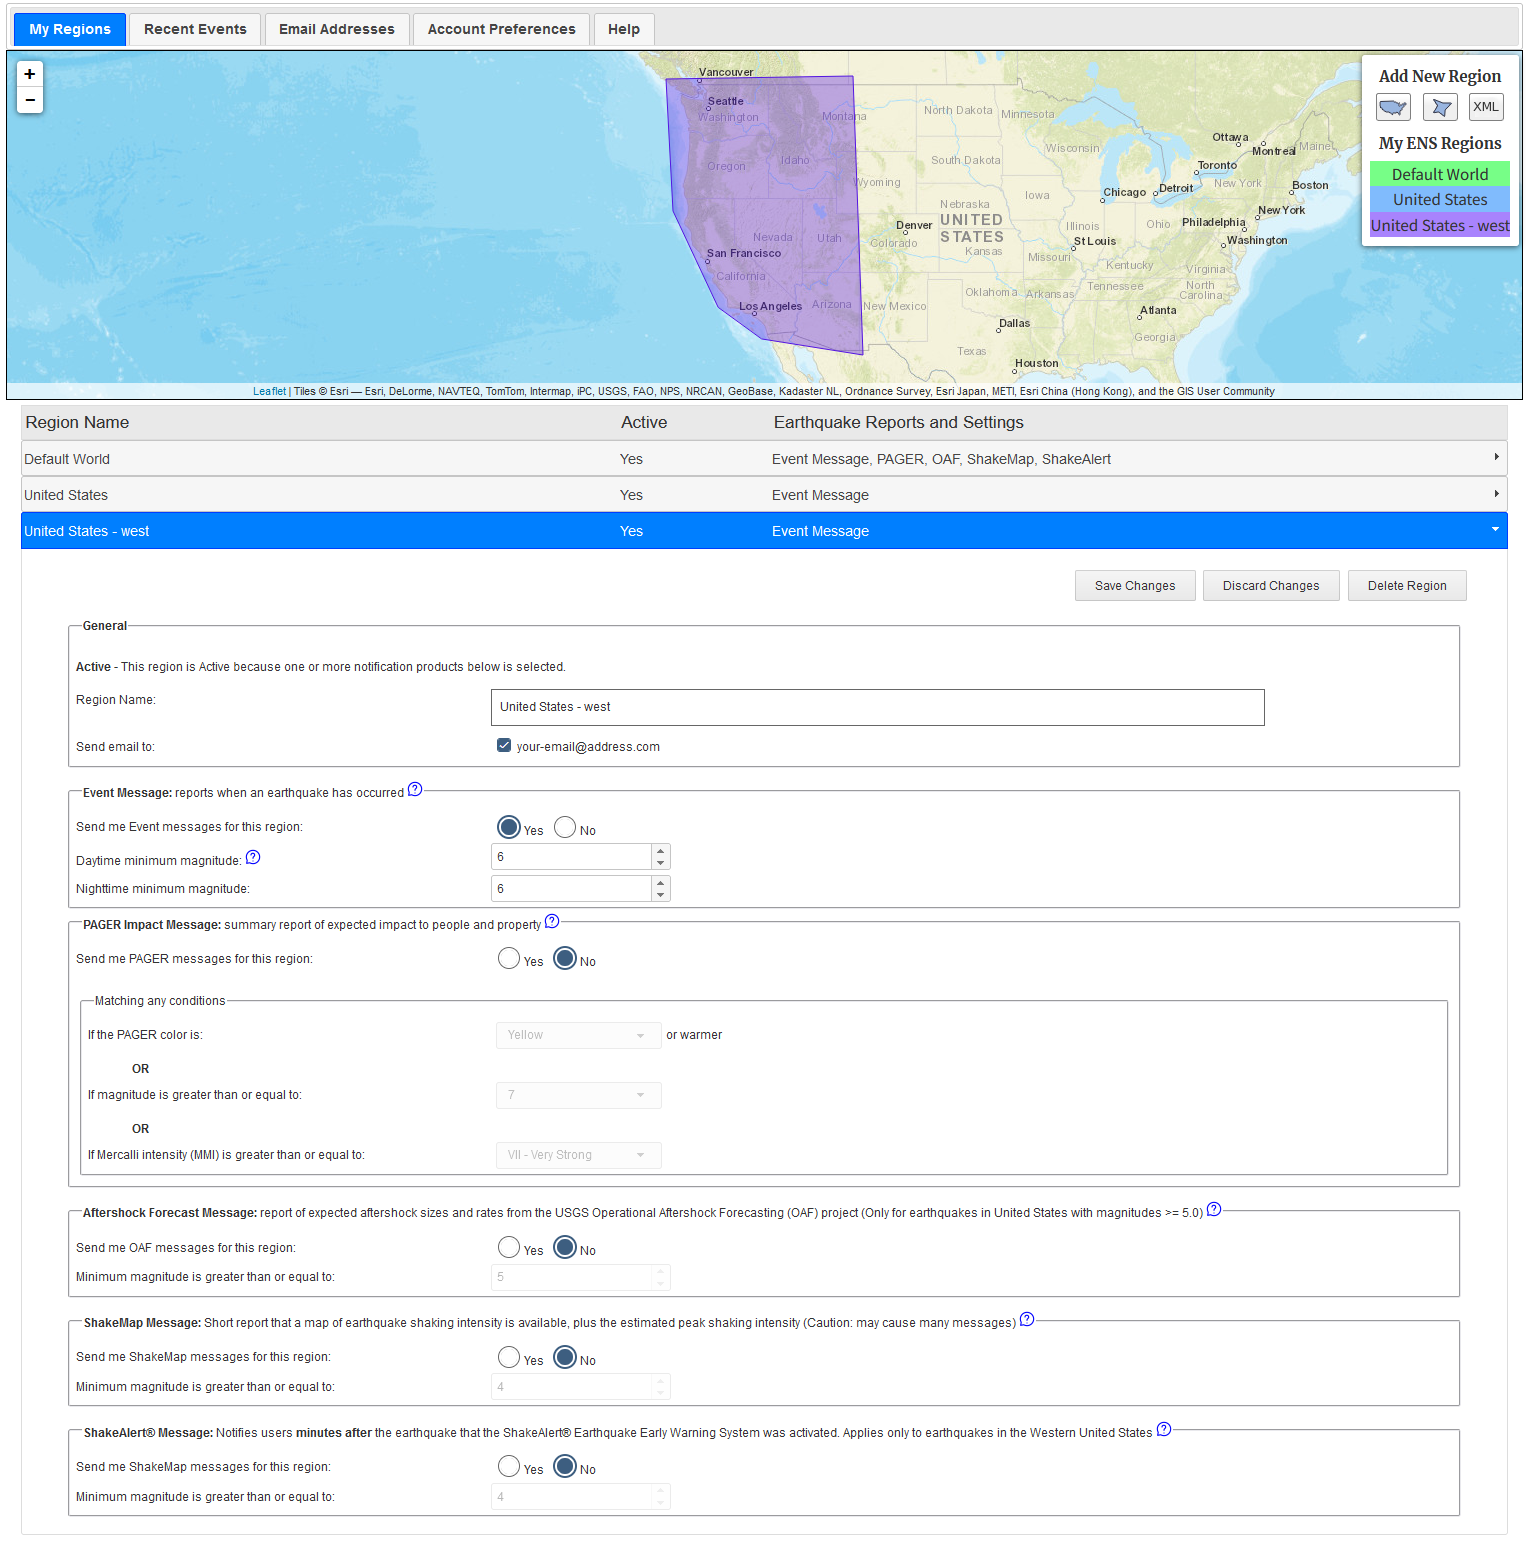
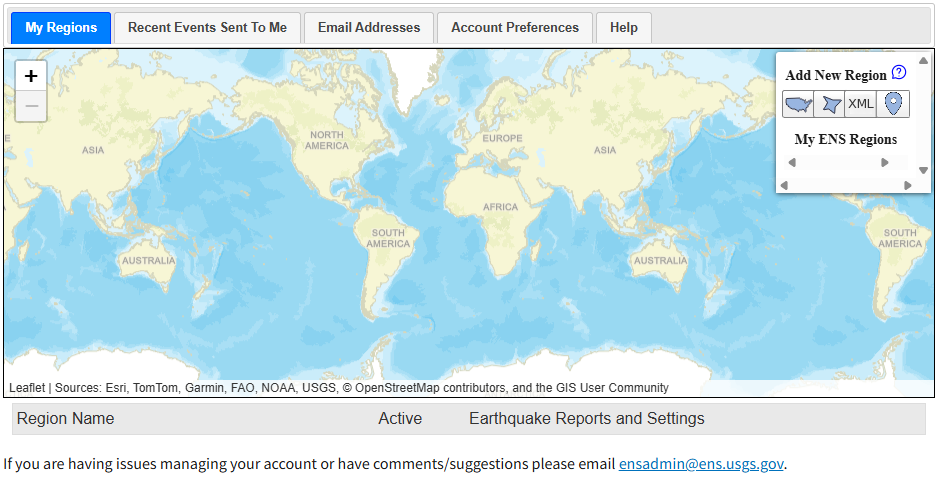
Overview: The map in your ENS homepage displays your notification regions.
Select a notification region on the map, from the list on the right side of the map, or from the list
below the map to open a
view in which you can review and edit current settings.
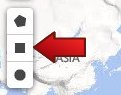
Click on one of the three images in the
upper-right corner to add a new notification region - Predefined, Custom, or Input by XML.
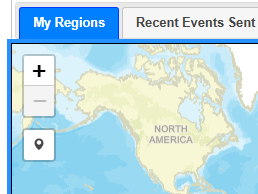
To zoom in or out use the "+" or "-" icons on the left side of the map; click and drag to pan. The map automatically wraps horizontally, so, depending on your zoom level, you may see more than the entire world.
- For most users, ENS Predefined Regions will fit their interests. Examples:
- For earthquakes anywhere in the world select the World Region.
- Select the U.S. Region for earthquakes in the United States.
- Other options include U.S. states and major U.S. regions such as the Western U.S.
- If the earthquake matches more than one active region, ENS will send only one notification per requested product type.
- Click
 Add a Predefined region to open a list of predefined regions.
 - Choose a region (Folders containing regions are in ALL CAPITAL LETTERS)
- Accept or modify the Region name, then click Continue to Notification Settings...
- Continue with message selections and settings.
- Click Save Changes when done.
A Region Information Table will show your regions. If none appear, please add a notification region to complete the account setup.

Each row gives a brief region name, whether or not the notification region is active, and a list of notification products associated with that region.
|
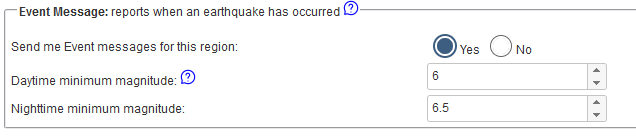
Event Message:
|
|
|
PAGER Impact Message:
|
|
|
Aftershock Forecast Message:
|
|
|
ShakeMap Message:
|
|
|
ShakeAlert® Performance Report Message:
|
|


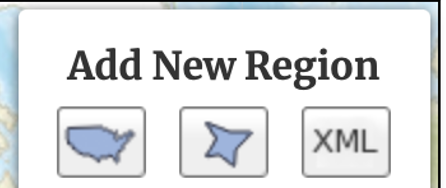
To add a new ENS region, you use the control in the top right corner of the map. The three types of regions are (from left to right) Predefined, Custom, and XML.
Adding a Predefined region
Clicking on the predefined region button
will display a Button "Choose a region". Select that to display a list of the available predefined regions.

Pick a region from the drop down menu. Regions are in Mixed Upper and Lower Case.
This will add the region to the map and open an entry box to (re)name the region if desired.
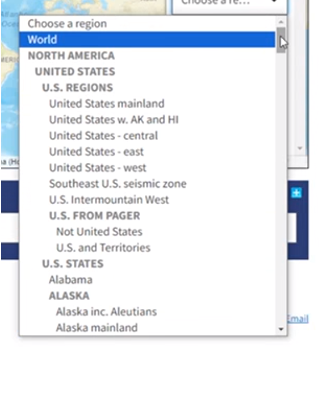
Confirm with the "Continue to Notification Settings..." button, select another region, or stop with "Cancel".
When a region is added to the map, the Region Information Panel expands below with the new region name displayed..

Recommendations for Message Settings
In general the magnitude setting determines how many
notifications to expect for a given region. Use the magnitude
and product choices to manage email volume.
- Event Message: Worldwide, an earthquake of magnitude M 6.0 or larger happens somewhere in the world about once every three days on average, although it is not uncommon to go for a week or more with none.
- In the western continental U.S. M > 4.0 average about 1/week, but there could be several per week or several weeks with none.
- In the eastern U.S. and most of Europe earthquakes with M > 2.5 are not common and are often felt by many.
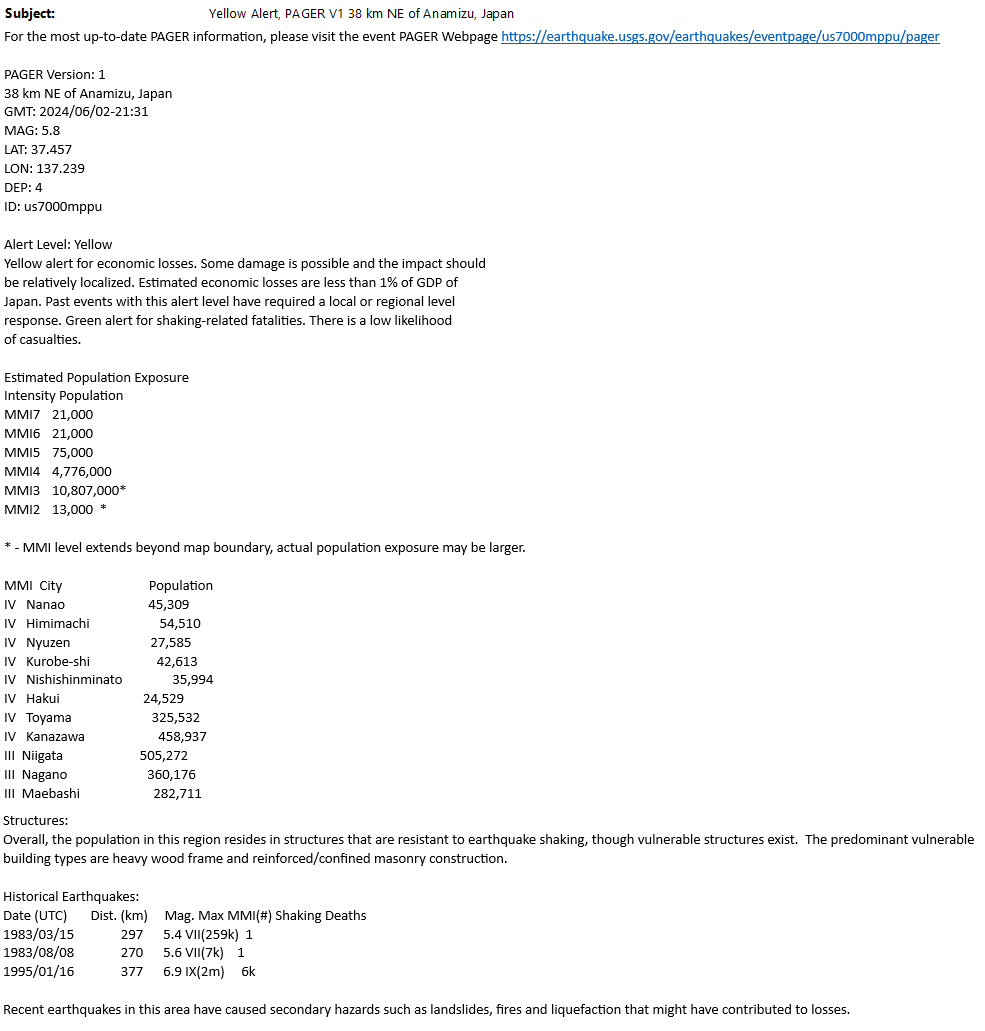
- PAGER: Many PAGER subscribers will get good results with M ≥ 7.0, Mercalli Intensity MMI ≥ 7 and PAGER Earthquake Impact Scale ≥ Yellow. These settings notify on strong earthquakes or intense shaking, regardless of damage, but will report on smaller earthquakes estimated to cause damage or injuries.
- Users only concerned about earthquakes with estimated injuries or damage may prefer PAGER Earthquake Impact Scale Yellow, and higher values for M and MMI.
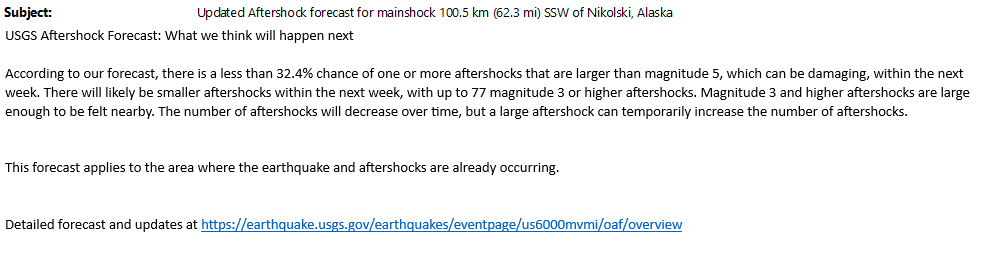
- Aftershock Forecast: Aftershock Forecast messages are made for earthquakes M ≥ 4.0 in the continental United States and M ≥ 5.0 in Alaska and U.S. Territories, and occasionally for exceptional damaging international earthquakes. Subscribers can expect messages for 1 to 3 earthquakes per week.
- ShakeMap: ShakeMaps are generally made for earthquakes M ≥ 4.0 worldwide. A low M value could result in many messages per day. Generally users will want to select ShakeMap notifications only for geographically limited areas.
- ShakeAlert®: ShakeAlert® reports are made for earthquakes M ≥ 4.0 in the states of California, Oregon, and Washington. On average M ≥ 4.0 will result about one message per week.
Click Save Changes to save region product selections and settings.
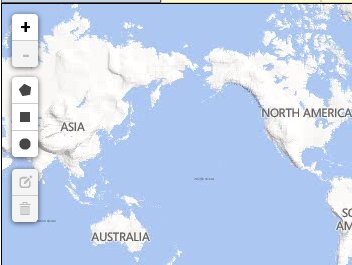
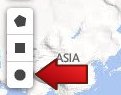
Adding a Custom Region
Click the Custom region button  to start drawing a custom region. The toolbar on the left below the zoom buttons controls drawing.
The three buttons are for drawing polygons, rectangles, and circles.
To begin drawing, click on the one of the three draw buttons. Note that all other regions are hidden until you finish drawing.
to start drawing a custom region. The toolbar on the left below the zoom buttons controls drawing.
The three buttons are for drawing polygons, rectangles, and circles.
To begin drawing, click on the one of the three draw buttons. Note that all other regions are hidden until you finish drawing.
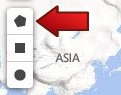
Drawing a polygon
Click the 'draw a polygon' button on the toolbar:
Click the map to draw the polygon. Click the last point to close the polygon.
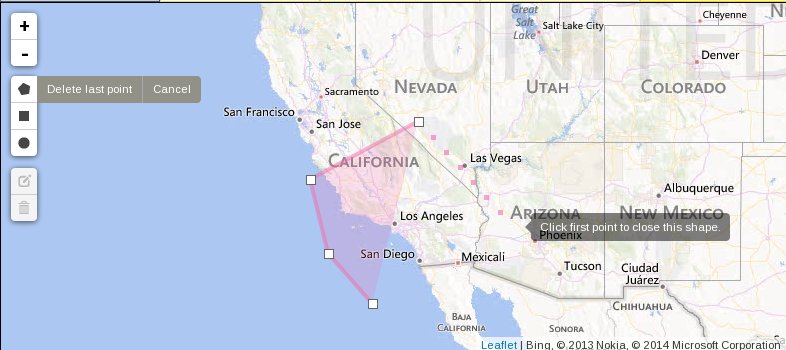
Enter a name for your region, and click "Continue to Notification Settings..."
In the Region Information Panel select notification products of interest.
The new region will not be active until you select one or more products and click Save Changes in the Region Information Panel.
Adding a Rectangular region
Click the 'draw a rectangle' button:
Click the map to start drawing a rectangle. Note that all other regions are hidden until you finish drawing. A rectangular region is defined by clicking one corner and then dragging the pointer to the opposite corner.
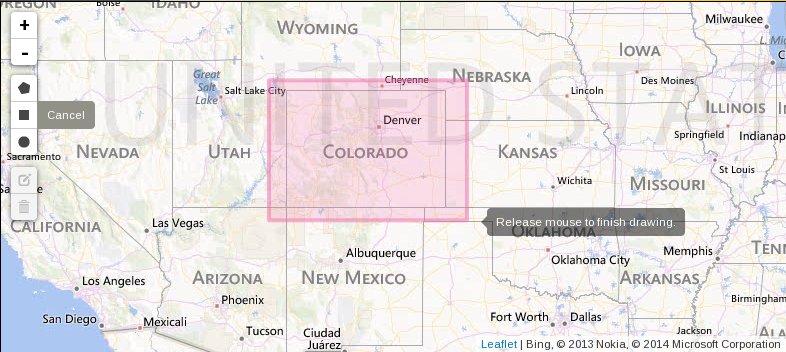
Enter a name for your region, and click "Continue to Notification Settings..."
In the Region Information Panel select notification products of interest.
The new region will not be active until you select one or more products and click Save Changes in the Region Information Panel.
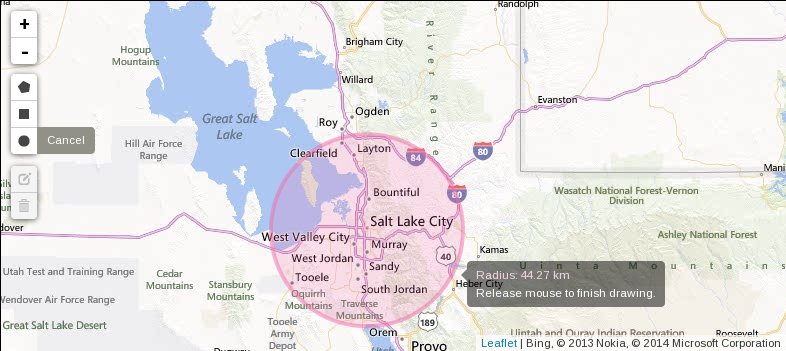
Adding a Circular region
Click the circular region button:
Click the map to start drawing a circle. Note that all other regions are hidden until you finish drawing. First, click the point you want to be the center of the circle. Then drag the pointer to define the radius.
Circles will become distorted near the poles. This is because Leaflet maps uses a mercator projection. In general, circles work best for defining relatively small areas. A circle with a radius over a 250 miles or 400km will be distorted by the curvature of the Earth.
Enter a name for your region, and click "Continue to Notification Settings..."
In the Region Information Panel select notification products of interest.
The new region will not be active until you select one or more products and click Save Changes in the Region Information Panel.
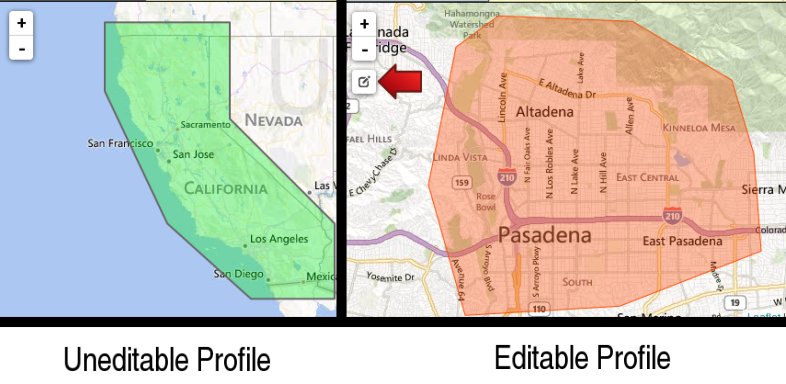
Editing A Region
Parameters for notification levels for an ENS region can be modified. On custom regions that you created, you can also change the region's coverage area. You cannot change the coverage area of pre-defined regions.
Click the region on the map, the region name in the My ENS Regions list or in the Region Information Table to edit settings.
You will find that the Region Information Panel expands below the map. Here you can set any of the parameters discussed above.
Only one region at a time can be open for editing.
Custom regions have a control button on the map, indicating that the custom region is editable.
To edit a custom polygon, click on the edit control button. Then, each corner of the polygon will have a small white box, and each line segment of the polygon also has a transparent white box at its middle. Dragging these transparent boxes allows you to add new points to the polygon. To remove a point, double-click on the box at the vertex you want to remove.
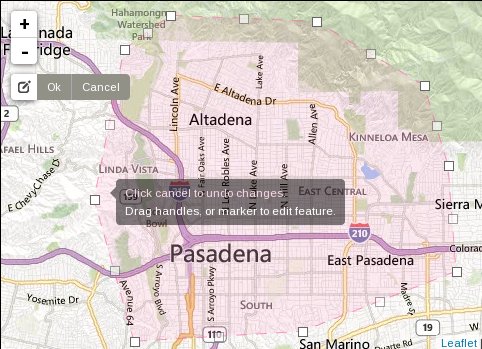
You can click the Cancel button before saving to undo all changes to the current region. When you are done editing your polygon, click the OK button to finish editing. Changes will be saved when you click the Save Changes button at the bottom of the region form.
Click Save Changes when you are finished editing.
Rectangular regions show four boxes at the corners, and one at the center when the rectangle is editable.

Drag the corner icons to reshape the rectangle. Click and drag the center icon to move the rectangle without changing its shape. Clicking Cancel or Discard Changes will undo all modifications to the current regions.
Click Save Changes when you are finished editing.
Circular regions show an icon at the center and an icon on the radius when the circle is editable.
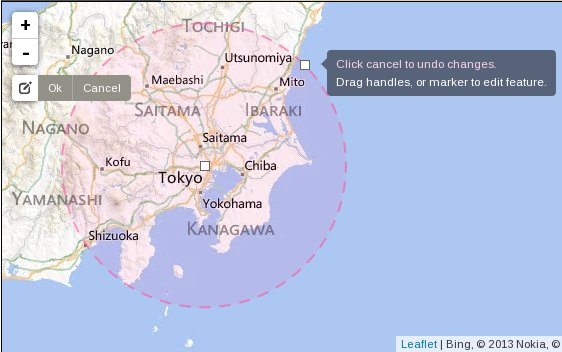
Drag the center icon to relocate the circle without changing its size.
Drag the icon on the circle's radius to resize the circle.
Click Save Changes when you are finished editing.
Notes:
- All underlined field tags are links to Help for that tag.
- You may turn any or all message types for a region off and on without deleting the region by selecting your region in the Region Information Table or the My ENS Regions list, and then checking "Yes" or "No" for the message type(s).
- If your account affiliation is classified as Scientist/Network Operator, you can also specify the network(s) to receive events from, and the depth range of events as well.
Using XML to Define a Region
ENS accepts raw XML to define a region instead of selecting an area on the map. To use the raw XML, the XML must be in the following format:
For example, the following is a valid XML data:
Please check that your XML meets the following requirements:
- There must be at least 3 coordinates
- Each "<point>" element must be on the same line with latitude and longitude
- Only one "<region>" element
- Latitude and longitude may use up to 3 decimal places
- XML header should not be used
- Maximum of 20 latitude/longitude points
- UTF-8 encoded
Example Messages
-
Example Event Messages
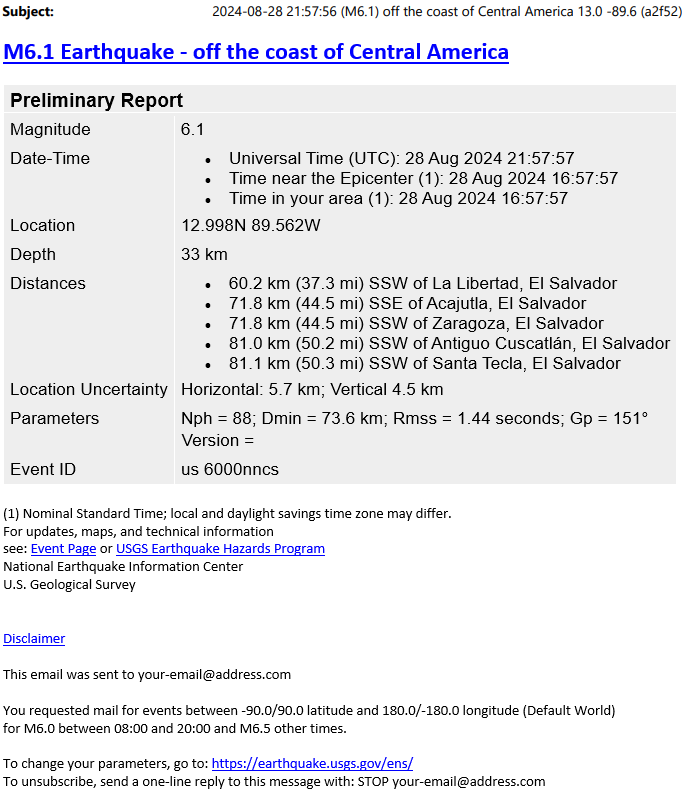
-
Example PAGER Summary Messages
-
Example Aftershock Forecast Summary Messages
-
Example ShakeMap Summary Messages

-
Example ShakeAlert® Follow-up Messages

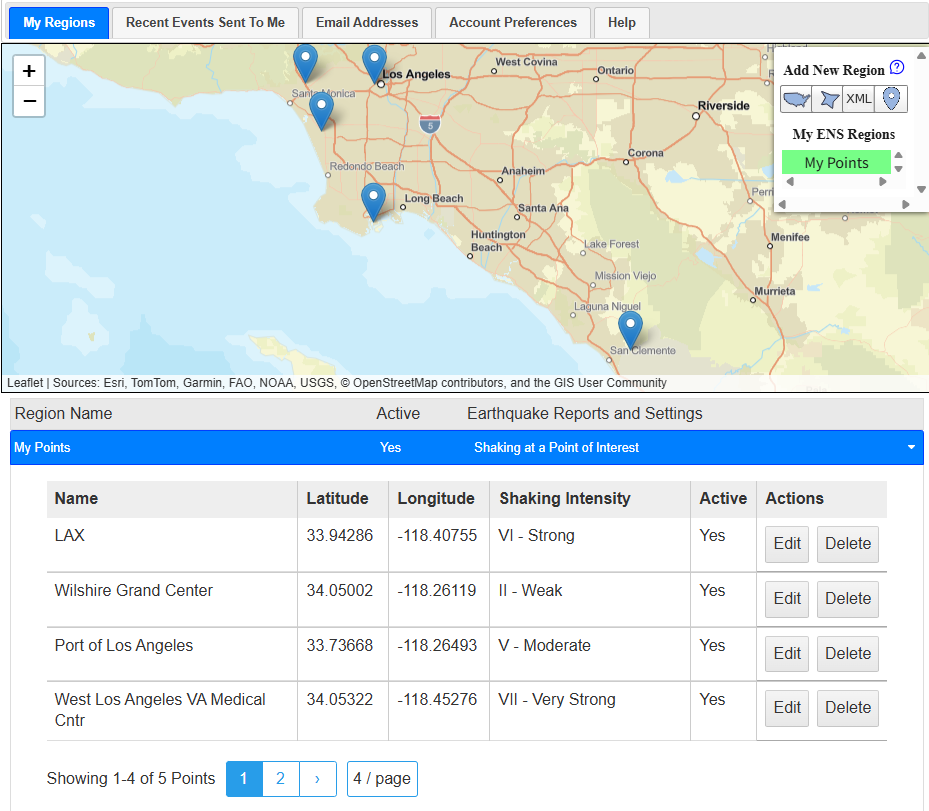
Managing ENS Points and Notifications
Overview: The map also displays your notification points.
Click Add a marker in the panel on the right to activate the drawing tools. The Draw a marker button will appear in the drawing tools on the left side of the map; use it to place a new marker, or enter coordinates directly in the text fields below the button row.
After an earthquake occurs, ShakeMap processes the regions and then Shaking at a Point of Interest (this product) checks your notification points. You set a minimum shaking intensity for each point. If the estimated shaking meets or exceeds that level, a notification is sent to your configured addresses about 5 minutes after ShakeMap finishes processing. If the shaking falls below your threshold, no notification is sent for that point.
Adding A Notification Point
Complete and save one point at a time to ensure each point's notification settings are fully configured before moving on.
- Click
 Add a marker to display the Draw a marker
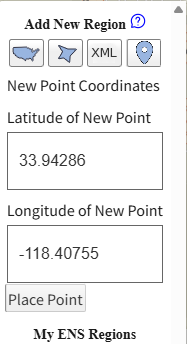
button on the toolbar to the left and the New Point Coordinates text fields below the
button row.
Add a marker to display the Draw a marker
button on the toolbar to the left and the New Point Coordinates text fields below the
button row.

- Place the marker on the map using either the mouse or keyboard.
- Mouse: Click the
 Draw a marker button and
then click on the map to place the marker. Use the zoom abilities as required, including Shift +
Drag to zoom in to a rectangle area.
Draw a marker button and
then click on the map to place the marker. Use the zoom abilities as required, including Shift +
Drag to zoom in to a rectangle area.
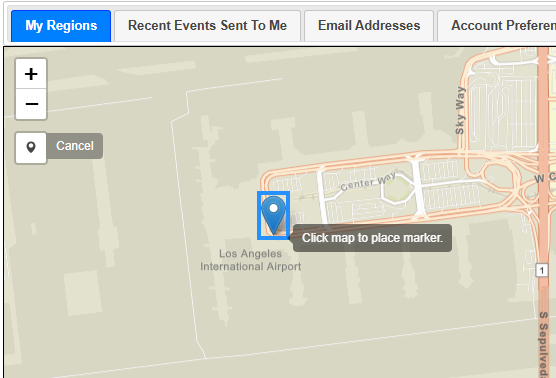
- Keyboard: Type the Latitude of New Point and Longitude of New
Point, and then press Place Point button to place the marker.
- Mouse: Click the
- (Optional) With the marker on the map, adjust its exact position with
- the mouse by clicking the
 Edit layers button
on the map toolbar to enable click and drag
Edit layers button
on the map toolbar to enable click and drag
- the keyboard by adjusting coordinates

- the mouse by clicking the
- When finished placing the point, name the point something unique to your account for easy recognition.

- Click Continue to Notification Settings... to configure your new point.
- Adjust the Notification Settings for this point as described below.
- Click Save in the Notification Settings popup when done.
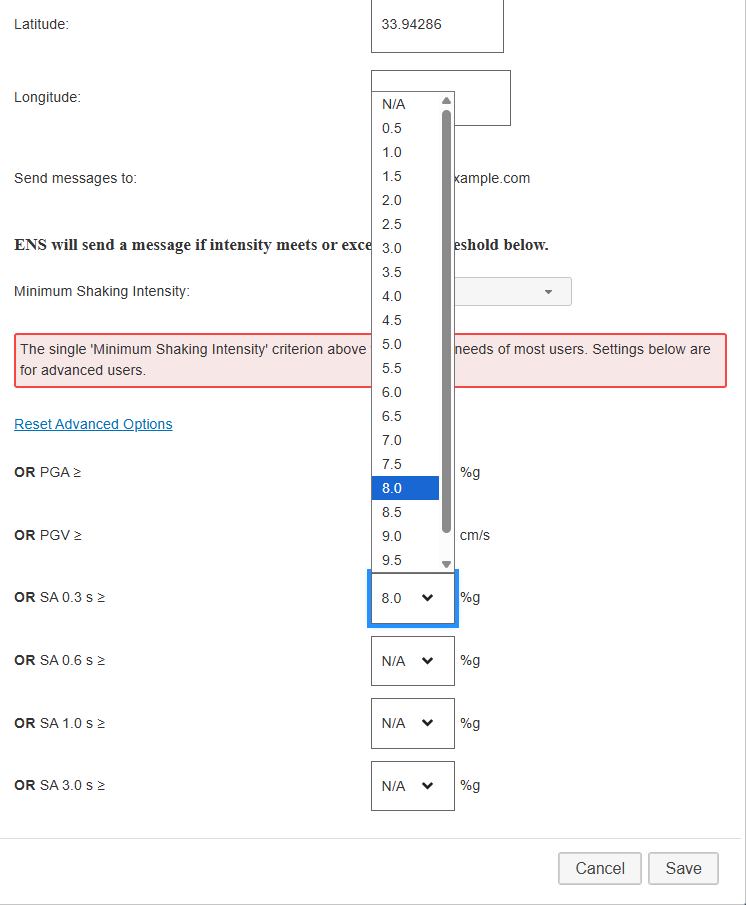
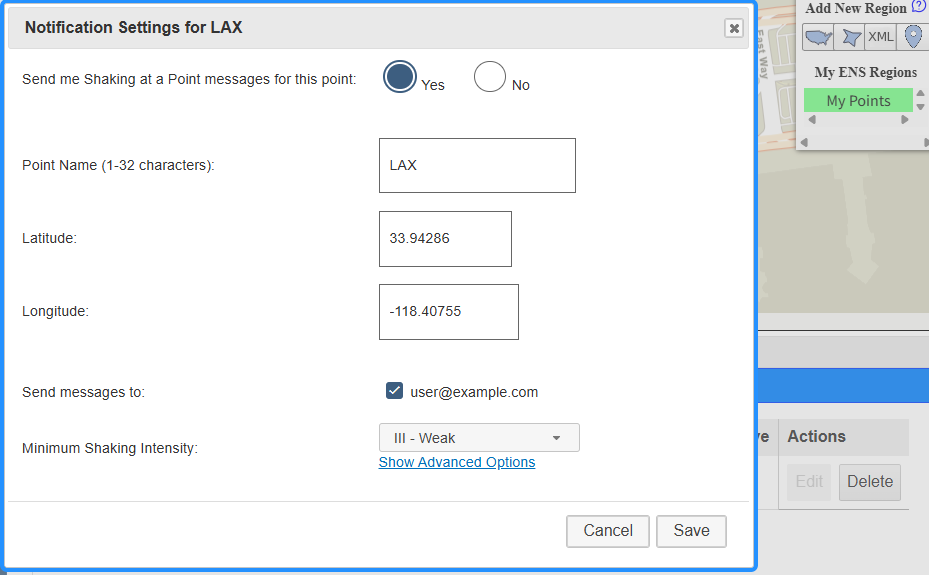
Notification Settings
The Notification Settings popup displays with the point name and location previously configured. Each point is configured independently with its own active status, name, coordinates, notification addresses, and minimum shaking intensity. These fields are available to change upon point creation:
- whether this point is active for notifications
- the notification addresses to receive notifications for this point
- the minimum shaking intensity for this point to trigger a notification
- advanced options
Choosing to not receive notifications (selecting No) keeps the point saved in your account but excludes it from notification processing — useful if you want to temporarily pause alerts for a location without deleting it.
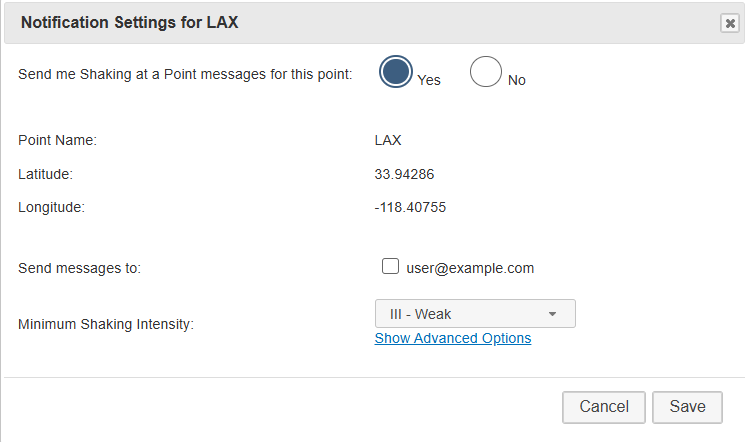
A lower intensity (like III - Weak) will trigger notifications for more earthquakes, including minor shaking that might not be noticeable. A higher intensity (such as VI - Strong) limits notifications to significant shaking events. Choose a threshold that reflects how much shaking at this location would actually matter to you.

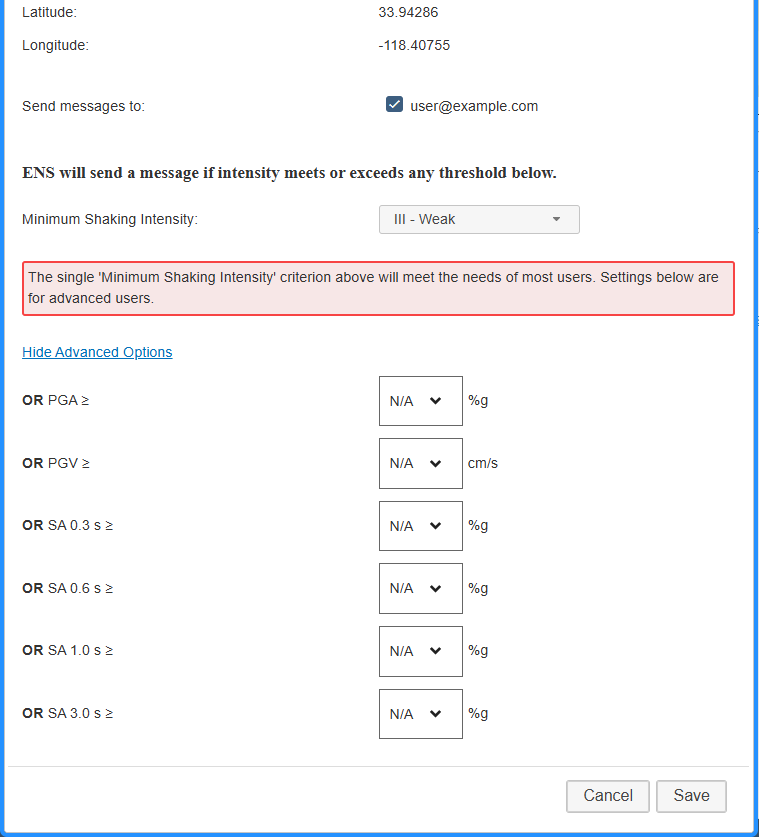
(Optional) For most users, Minimum Shaking Intensity is sufficient. Click Show Advanced Options to configure individual IMT thresholds for finer control. Each threshold acts independently; a point triggers a notification if any one threshold is met or surpassed. These settings assume familiarity with intensity measure types not covered in this guide.
Click Save when finished setting the values for this point to save the point and its settings to the database. Once saved, the popup hides and the My Points section displays in the Region Information Table.

Region Information Table Additions
The Region Information Table adds the My Points section at the top of the list. If you do not see it, ensure your point has been named and its notification settings saved.
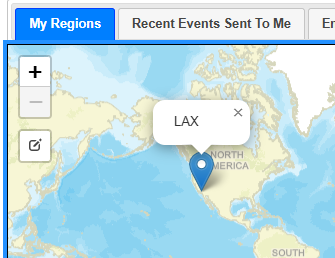
Expanding My Points in the Region Information Table, or clicking My Points in the panel on the right side of the map, displays your saved points on the map and shows the My Points table below. The My Points row also indicates whether any points are currently active for the Shaking at a Point of Interest product.
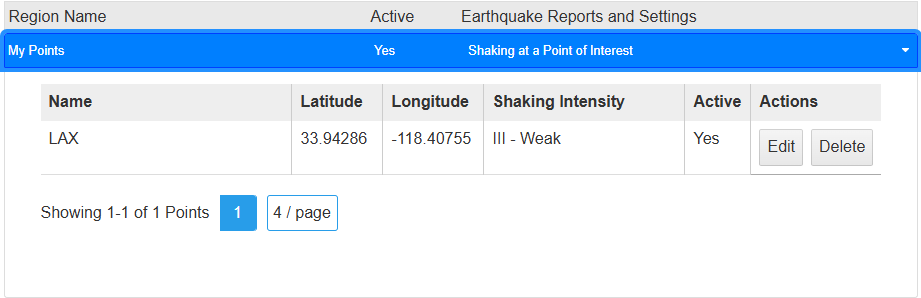
My Points Table
The My Points table lists all your saved points in the order they were created, with each row showing the point's name, coordinates, notification addresses, intensity threshold, active status, and action buttons. Click a marker on the map to display its corresponding row in the My Points table or use the pagination controls to browse all points.

Each row's Edit button opens the Notification Settings popup with that point's settings. Similar to adding a point, the edit version allows changing if the point is active for notifications, which addresses get messages, and the minimum shaking intensity, as well as updating the name and coordinates. Advanced options are available.
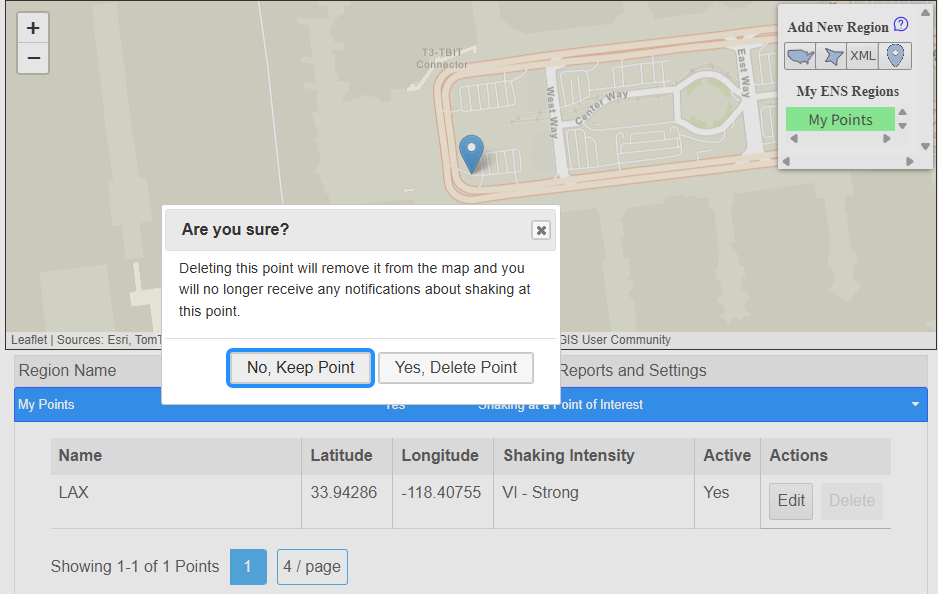
The Delete button deletes the user point upon user confirmation. Any deleted points will not be used when determining notifications.
Moving a Point on the Map
Mouse:
- Click the
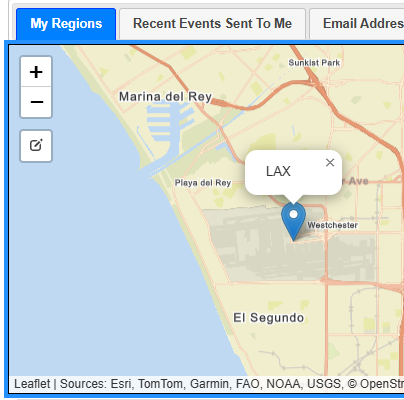
 marker on the map to enable the Edit layers button on the map
toolbar. This will display the point's name above the marker.
marker on the map to enable the Edit layers button on the map
toolbar. This will display the point's name above the marker.
- Zoom in or out as necessary.
- Click the Edit layers button and the marker will have an outline,
indicating the marker is ready for drag and drop placement elsewhere on the map.
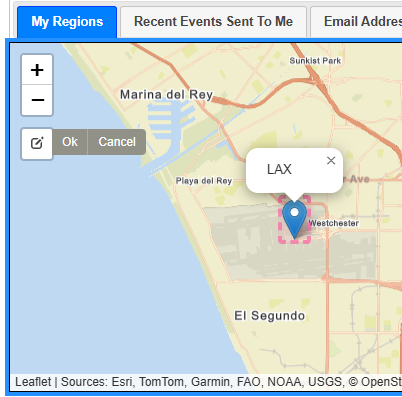
- Click and drag the marker to the new location, releasing the mouse button when done.
- Click the Ok button on the map toolbar to save the location or Cancel button on the map toolbar to cancel the edit.
Keyboard: Use the Edit button in the My Points table for the corresponding point to open the Notification Settings for that point and update the latitude and longitude values accordingly. The marker on the map will move after saving the point in the Notification Settings popup.
Notification Message Examples
The following examples show the notification messages sent for each delivery method when at least one of your points is shaken at or above the intensity you selected. The advanced template is only available for email.
Email Standard
Subject: User points in ShakeMap for M 6.7 - 1km NNW of Reseda, CA
One or more of your ENS points is in the bounds of a new ShakeMap centered on 34.213N,
118.537W, 2026-06-02 12:46 UT, version 1,
https://earthquake.usgs.gov/earthquakes/eventpage/ci3144585/shakemap.

Number of user points in ShakeMap: 1

Peak shaking intensity estimate among user points: 5.9

User Points:

Intensity  Name Lat, Lon

5.9, Disneyland, 33.8121, -117.919


See https://earthquake.usgs.gov/data/shakemap for how shaking intensities are estimated by
ShakeMap. Shaking estimates are preliminary and based on information available at the time the
message is sent. Please check the USGS Web site for updates. Shaking estimates are uncertain
so care is required if using for decision-making.
Email Advanced
When at least one triggered user point has an advanced options IMT value, the email format changes from standard to advanced.
Subject: User points in ShakeMap for M 6.7 - 1km NNW of Reseda, CA
Source: USGS ENS Points. User points in ShakeMap for M 6.7 - 1km NNW of Reseda, CA, 34.213N,
118.537W, 2026-06-02 12:46 UT, version 1,
https://earthquake.usgs.gov/earthquakes/eventpage/ci3144585/shakemap.

Number of user points in ShakeMap: 1

Peak shaking intensity estimate among user points: 5.9

User Points:

Intensity, Name, lat, lon, PGA, PGV, SA(3.0), SA(1.0), SA(0.3) (1)

5.9, Disneyland, 33.8121, -117.919, 10.47, 9.63, 2.29, 12.77, 27.28


(1) PGA: peak ground acceleration, m/s/s; PGV: peak ground velocity (m/s); SA(.): spectral
acceleration (m/s/s) at the indicated frequency in Hz.

See https://earthquake.usgs.gov/data/shakemap for how shaking intensities are estimated by
ShakeMap. Shaking estimates are preliminary and based on information available at the time the
message is sent. Please check the USGS Web site for updates. Shaking estimates are uncertain
so care is required if using for decision-making.
SMS
M 6.7 quake, user has 1 point shaken, https://ens-eq.usgs.gov/q8mf7f, 2026-06-02 12:46 UT, 1km
NNW of Reseda, CA